|
You may access the graphical interface to administer your server and choose your custom settings in two ways:
| I |
click on the !M icon in the system tray to open the menu. Then click on Show the service status and finally on Server preferences or |
| II |
launch NoMachine from your program menu, click on Settings and then on the Server preferences link at the bottom of the panel. |
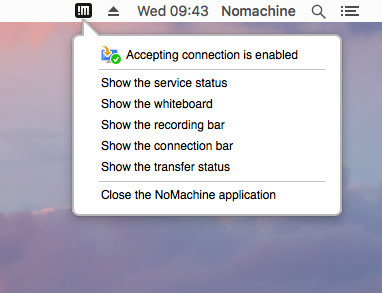
Fig. 1(i) - Open the !M menu and click 'Show the service status' to open it
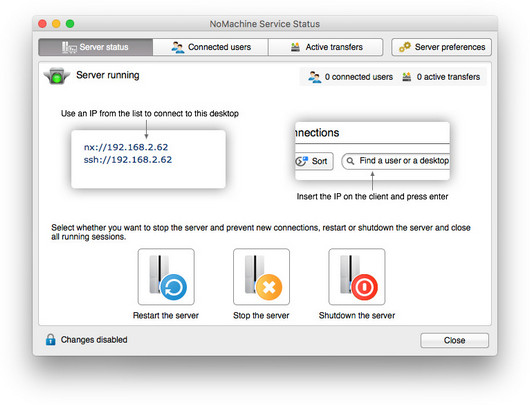
Fig. 1(ii) - Click on 'Server preferences' to open the GUI
The NoMachine Server preferences interface is made of six tabs to switch about the available configuration panels: Services, Security, Devices, Transfers, Performance and Updates.
| TIP |
 |
|
|
|
Administrative rights are required
Check on the bottom left of the Preferences panel to see if changes are disabled (default) or not.
By clicking on the Changes disabled link you will be requested to provide authentication credentials for a user with administrative privileges. You will be prompted with the same request also when trying to modify any of the available settings if changes have not been previously enabled. |
The Service panel shows the current status of NoMachine Network services, but not of the server itself.
To see the NoMachine server status, click on the !M icon in the system tray and then select on 'Show the service status'.
You will be able to turn on/off the server. When choosing to shutdown the server you will be requested if the server has to be automatically restarted when rebooting.
In the Service panel, NoMachine Free and Terminal Server Node provide only 'NX' which is the NoMachine network service (nxd) in charge of accepting connections by NX protocol.

Fig. 2 - Server preferences > Services
The other NoMachine servers list also the HTTP/HTTPS services necessary to serve sessions on the web. NoMachine on Windows has an additional built-in service to accept connections by SSH protocol (nxsshd):
| Service Name (GUI) |
Program name |
Default port |
Scope |
Note |
| NX |
nxd |
4000 |
Accept connections by NX protocol |
With all servers and on all platforms |
| HTTP and HTTPS |
nxhtd |
4080 and 4443 |
Accept web connections |
With all servers (except NoMachine free) and on all platforms |
| SSH |
nxsshd |
4022 |
Accept connections by SSH protocol |
With Cloud Server and Enterprise Desktop on Windows (on Mac and Linux, NoMachine relies on the system SSH server) |
Click on any of the services listed in the GUI to access its administrative panel where you can:
| a) |
Change the local port for the service(e.g. NX is using by default port 4000, you may change it to for example 4200). This is the Service port, 'Port'. |
| b) |
Change the port mapped in the router or firewall to allow connections over the Internet. This is the Gateway port, 'GW Port'. |
| TIPS |
|
|
|
|
| I |
Changing the service's port requires to restart NoMachine.
When changing the service port, it's always requested to restart the NoMachine server. This will terminate all current connections and on Linux it will terminate also all virtual desktops, even those disconnected. |
| II |
Port mapping is enabled by default only for NoMachine free. For all the other NoMachine server types it's necessary to flag the Gateway port to enable it.
The automatic port mapping requires that the router supports the UPnP or NAT-PMP protocol. Otherwise it will be necessary to configure the router manually and open the requested port. For example if you use NoMachine free, you will need to open port 4000 on the router and map it to the public IP address of your NoMachine (server) host. |
| III |
You may disable the port mapping by unflagging the Gateway port if you do not expect connections from outside your private network. |
In the Service panel you can also:
| c) |
Define if the service has to be automatically started at every reboot (this is Start mode -> Automatic) or manually started (Start mode -> Manual). |
| d) |
See the current status of the service, Stop and then Start it or Restart the service. |
| e) |
Start automatic services at startup to ensure that all services with the Startup option set to 'Automatic' will be started when the host machine is rebooted, see point c). |
| f) |
Manage the visibility of this computer to NoMachine users in the same local network. Select Advertise this computer on the network to let other computers running NoMachine find this computer on the local network. This computer will not be visible outside the private network. |
The Security preferences panel allows to configure the users' level of interactivity with the desktop, and notifications about incoming requests for connections.
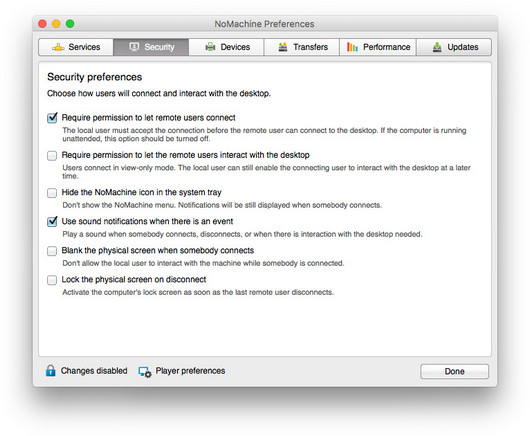
Fig. 3 - Preferences > Security
These are the available settings in detail:
| a) |
Automatically accept the incoming connection or ask for the desktop owner's authorization.
Select Require permission to let remote users connect when the explicit approval of the desktop owner is necessary. This option applies only to connections to the physical desktop when the connecting user is not the desktop owner. If the incoming user is the desktop owner, he/she will always connect and no request for authorization is issued.
The request for desktop owner's authorization is enabled by default. |
| b) |
Configure the interactivity level with the desktop.
By default the connected user can interact with the desktop. Check Require permission to let the remote user interact with the desktop to let the desktop owner allow or forbid the user to interact with the desktop.
This option applies only to connections to the physical desktop when the connecting user is not the desktop owner. If the incoming user is the desktop owner, he/she will always be able to interact with the desktop. |
| c) |
Manage the display of the !M icon in the system tray.
When NoMachine is up and running, the !M icon is always present in the system tray. If it's necessary to not show this icon, select Hide the NoMachine icon in the system tray. Note that all notification pop-ups (for example about a user being connected) will be still displayed.
When the !M icon is not displayed, the server administrative interface may be accessed from the NoMachine GUI. |
| d) |
Sound notifications.
By default sound notifications for users' connection and disconnection are enabled, as well as when notification dialogs requesting for user's interaction are issued (for example the dialog asking for the user's interaction level). To disable sound alerts, unflag Use sound notifications when there is an event. |
| e) |
Screen blanking.
When the user connects to the remote physical desktop it's possible to activate the Blank the physical screen when somebody is connected option. In this case only a black screen will be displayed on the physical monitor of the server host. The local user in front of the physical monitor will be not able to interact with the desktop until the NoMachine user logs-out. Use this option with the screen locking to protect the computer while running unattended. |
| f) |
Screen locking.
A new option for connections to the physical desktop (available since v. 6.1.6), allows to activate the automatic lock of the remote screen: Lock the physical screen on disconnect. The screen lock is activated as soon as the last NoMachine user disconnects from the desktop. |
| TIPS |
|
|
|
|
| I |
If users will have to access a computer running unattended, it's necessary to turn off Require permission to let remote users connect or the user will be unable to connect.
For Linux virtual desktops, the desktop owner's authorization is requested by default when the connecting user is not the desktop owner. This can be disabled by editing manually the server configuration file (/usr/NX/etc/server.cfg), uncommenting and setting this key: VirtualDesktopAuthorization 0). |
| II |
Switching between the view-only mode and the interactive mode is possible at any time without the need to restart the connection. Click on the !M icon in the system tray to open the menu and select Yeld keyboard and mouse. This will open the list of the connected users: select the user who will have exclusive control on keyboard and mouse. This option doesn't apply to the owner of the physical desktop. |
| III |
More details and instructions about how to use the screen blanking are available here: https://www.nomachine.com/blanking-the-host-screen-during-remote-control |

Fig. 4 - Tip II: Choose the user who will control keyboard and mouse, all the other users's session will be in view-only mode
From this panel it is possible to manage which kind of devices can be shared within the session. Uncheck any of the available options to forbid the sharing of the selected device. This will apply to both directions: users will be not able to mount a local device from their machine to the remote session and a remote device will be not connected from the server host to the user's machine.
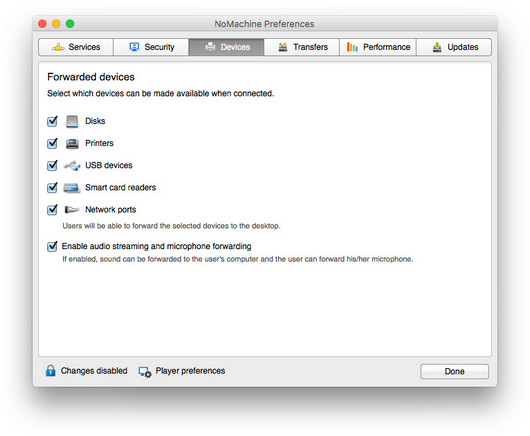
Fig. 5 - Preferences > Devices
Devices that may be connected inside the NoMachine session are:
| a) |
Disks
When this option is enabled, disk partitions can be mounted inside the session making their file system accessible. This is a two-way service and can be used for example for transferring a file from the remote desktop directly to a folder on the user's computer or vice-versa.
Users may decide if their connected disks will be private or public. A private disk is accessible only by the user who connecte it, public disks will be available for all users who will connect to the same (physical or virtual) desktop. By default private disks are mounted in the user's desktop, while public disks are mounted in the following directories: - on Windows in C:\Users\Public
- on Linux in /media
- on OSX in /Volumes
Other ways to copy a file between the user's device and the remote server host:
- Drag and drop the file from the local desktop to the remote desktop in the NoMachine session or vice-versa.
- Use the transfer file option available in the !M menu (click on the !M icon in the system tray to open it).
|
| b) |
Printers
When this option is enabled, two-way printing is supported: client-side printers can be integrated with the server-side printing subsystem and vice-versa.
Note that since the CUPS printing subsystem (on Linux and Mac) doesn't accept printer names containing spaces, NoMachine replaces a blank space with an underscore.
When users print from their PC to a printer on the remote printer in a session running on Linux, they cannot have feedback on the print job status due to a limitation of the printing subsystem.
When connecting their printer, users may make it private or public. A private printer is accessible only to the user who shared it, while a public printer will be available for all users.
Troubleshooting
Specific system configurations may be requested when the NoMachine server is on Linux or Mac systems. When the NoMachine Server is installed on Linux or Mac it's possibile that the printing system doesn't work out-of-the-box and some configurations on the server host may be required. In particular:
- Print with CUPS 1.4 or later: https://www.nomachine.com/AR05K00674
- Print to Mac 10.10: https://www.nomachine.com/AR09M00860
|
| c) |
USB devices
When this option is enabled, users can forward USB devices over the network such as hard disk, web cams, barcode readers, and pen drives from local to remote desktops and vice-versa.
Note that when users forward a local USB device to the remote session, this devices is connected on the remote machine and is no longer visible on the user's computer. For example, if it's a pendrive, it will stop to blink on the user's computer until it is connected with NoMachine. If it's a mouse, all inputs will be transferred on remote and will not have any effects on the user's local cursor.
Troubleshooting
This applies to NoMachine server installations on Linux. If the USB service is disabled in the Server preferences interface, it is likely that the USB module has not been compiled on your Linux during the installation of NoMachine. Instructions for manually compiling the USB module are available here: https://www.nomachine.com/AR12J00658
|
| c) |
Smart card readers
When this option is enabled, users may forward the smart card reader plugged into their computer to the server host and make available the smartcard authentication inside the session. This can be integrated with a Kerberos Ticket system for example to implement single sign-on (SSO).
The users's smart card device should support the PKCS#11 industry standard for smart card interfaces. |
| e) |
Network ports
When this option is enabled, users can create virtual network interfaces and establish a bridge between local and remote sides or vice-versa to provide transparent access to network resources. This service allows access to any of the default network servers like Samba, CUPS, FTP, SSH and Telnet or any other type, for example a MySQL server. |
| f) |
Enable audio streaming and microphone forwarding
This further option in the Devices panel allows to disable audio to avoid that sounds or music played inside the session is forwarded to the user's device. The same applies to the user's microphone.
For end-users
When users connect to the physical desktop, they may decide if forwarding their audio or not in the 'Audio streaming' panel that is displayed at session start-up. By default the 'Mute audio on the server while I'm connected' option is enabled and audio played inside the NoMachine session is not played on the server host.
By default microphone is always disabled: users will have to activate it from the NoMachine menu panel inside the session, by clicking on the 'Mic in' icon button. Click on the right upper corner of the session window to open the menu or press Ctrl+Alt+0
|
| TIP |
|
|
|
|
| Connecting disks, printers, USB devices and Network ports are all two-ways services. It's possible to disable the device forwarding only from client to server or vice-versa by manually editing the node configuration file (node.cfg). For more detailed instructions, refer to: https://www.nomachine.com/DT10O00151 |
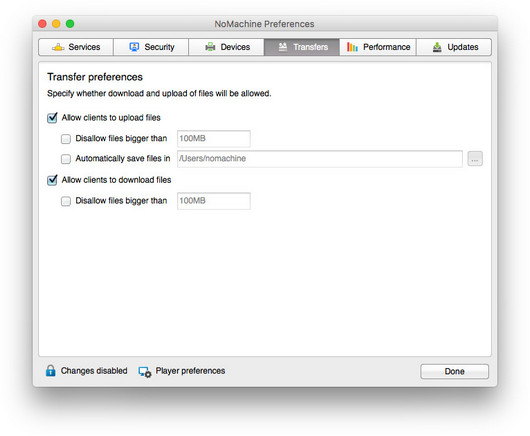
Fig. 6 - Preferences > Transfer
From this panel it's possible to:
| a) |
Forbid users to upload files from their devices to the remote server. Uncheck the Allow clients to upload files option for that.
The available configurations for files to be uploaded on the server host, when 'Allow clients to upload files' is enabled, are:
- Limit the size of files to be uploaded.
Check the Disallow files bigger than option and specify the size in MB. Default is 100 MB.
- Specify the directory where the uploaded files will be saved on the server.
Check the Automatically save files in option and choose the preferred path.
|
| b) |
Forbid users to download files from the server host to their devices by unchecking the Allow clients to download files option.
When 'Allow clients to download files' is enabled, it's possible to limit the size of files to be downloaded.
Check the Disallow files bigger than option and specify the size in MB. Default is 100 MB.
|
From this panel you may select the display encoding to be used for the NoMachine video streaming technique.
Among the other options, you can enable/disable from this panel the use of HW acceleration for display processing and the X11 vector graphics mode.
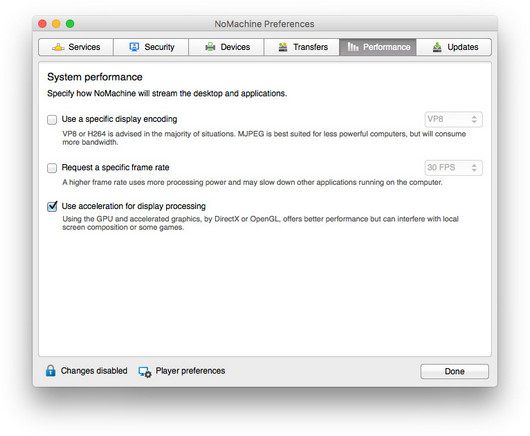
Fig. 7 - Preferences > Performance
In the Performance panel you can:
| a) |
Select Use a specific display encoding if you need to modify the encoding.
In general VP8 and H.264 are suitable for all situations, while MJPEG can be an alternative when the end-user's computer is less powerful and the user is experiencing slow responsiveness.
H.264 SW encoding
Since v. 6.6.8, all NoMachine server packages, included the evaluation and the free version, provide the H.264 encoder.
NoMachine Enterprise Client v. 6.6.8 or later provides the H.264 decoder.
H.264 HW encoding
NoMachine supports H.264 hardware encoding provided by graphics cards with Nvidia Kepler microarchitecture onward and Intel Quick Sync video cards on Windows and Linux (with manual configuration).
|
| b) |
Request a specific frame rate. This option refers to the number of images that are displayed in one second of video streaming.
If you enable this option, consider that using a higher frame rate allows to reproduce motions more smoothly but requires more CPU and may slow down other applications running on the server host. Deciding to use a higher or lower frame rate mainly depends on what users will play and on the server host HW resources. For example watching an action movie or game may require a higher frame rate while a lower frame rate should be enough for surfing the web or using an application.
|
| c) |
Enable/disable using HW acceleration for frame processing on the server. To enable support for HW acceleration, select the Use acceleration for display processing option.
HW acceleration for display processing is applicable to Windows only with support for DirectX (OpenGL on Mac and Linux coming soon).
Due to the huge possible combinations of drivers, video cards and operating systems, it is possible that hardware acceleration doesn't work with NoMachine. In this case it's suggested to disable it.
Note that it's possible to use HW acceleration for Linux virtual desktops in X11 vector graphics mode through the use of the VirtualGL library. This is independent from the 'Use acceleration for display processing' option in the GUI.
|
| d) |
Enable/disable the X11 vector graphics mode by means of the Use X11 vector graphics mode for virtual desktops option. This applies only to virtual desktops and custom sessions running in a virtual desktop. Note that custom sessions running in a floating window are always in X11 vector graphics mode. X11 vector graphics mode can instead be disabled/enabled for custom sessions running in a virtual desktop.
The X11 vector graphics mode is enabled by default. It reduces the bandwidth usage (and the HW requirements because it is less CPU intensive) on both client and server by optimizing the X11 protocol by means of compression techniques, round trip suppression and cache algorithms. This method is convenient when working with traditional GUIs or large amount of text to avoid loss of image quality, but it's not suggested for multimedia contents or applications with many graphical effects.
|
From the Updates panel you may manage the automatic software updates and your licenses.
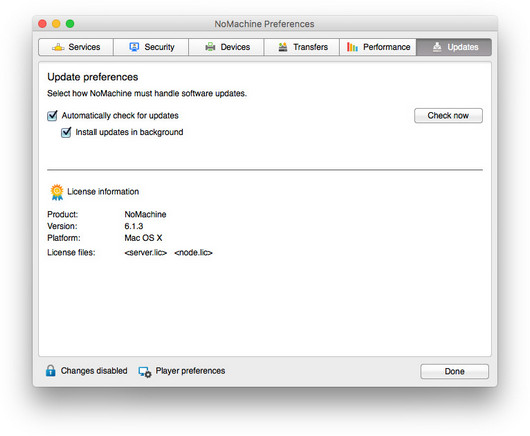
Fig. 8 - Preferences > Updates
|


